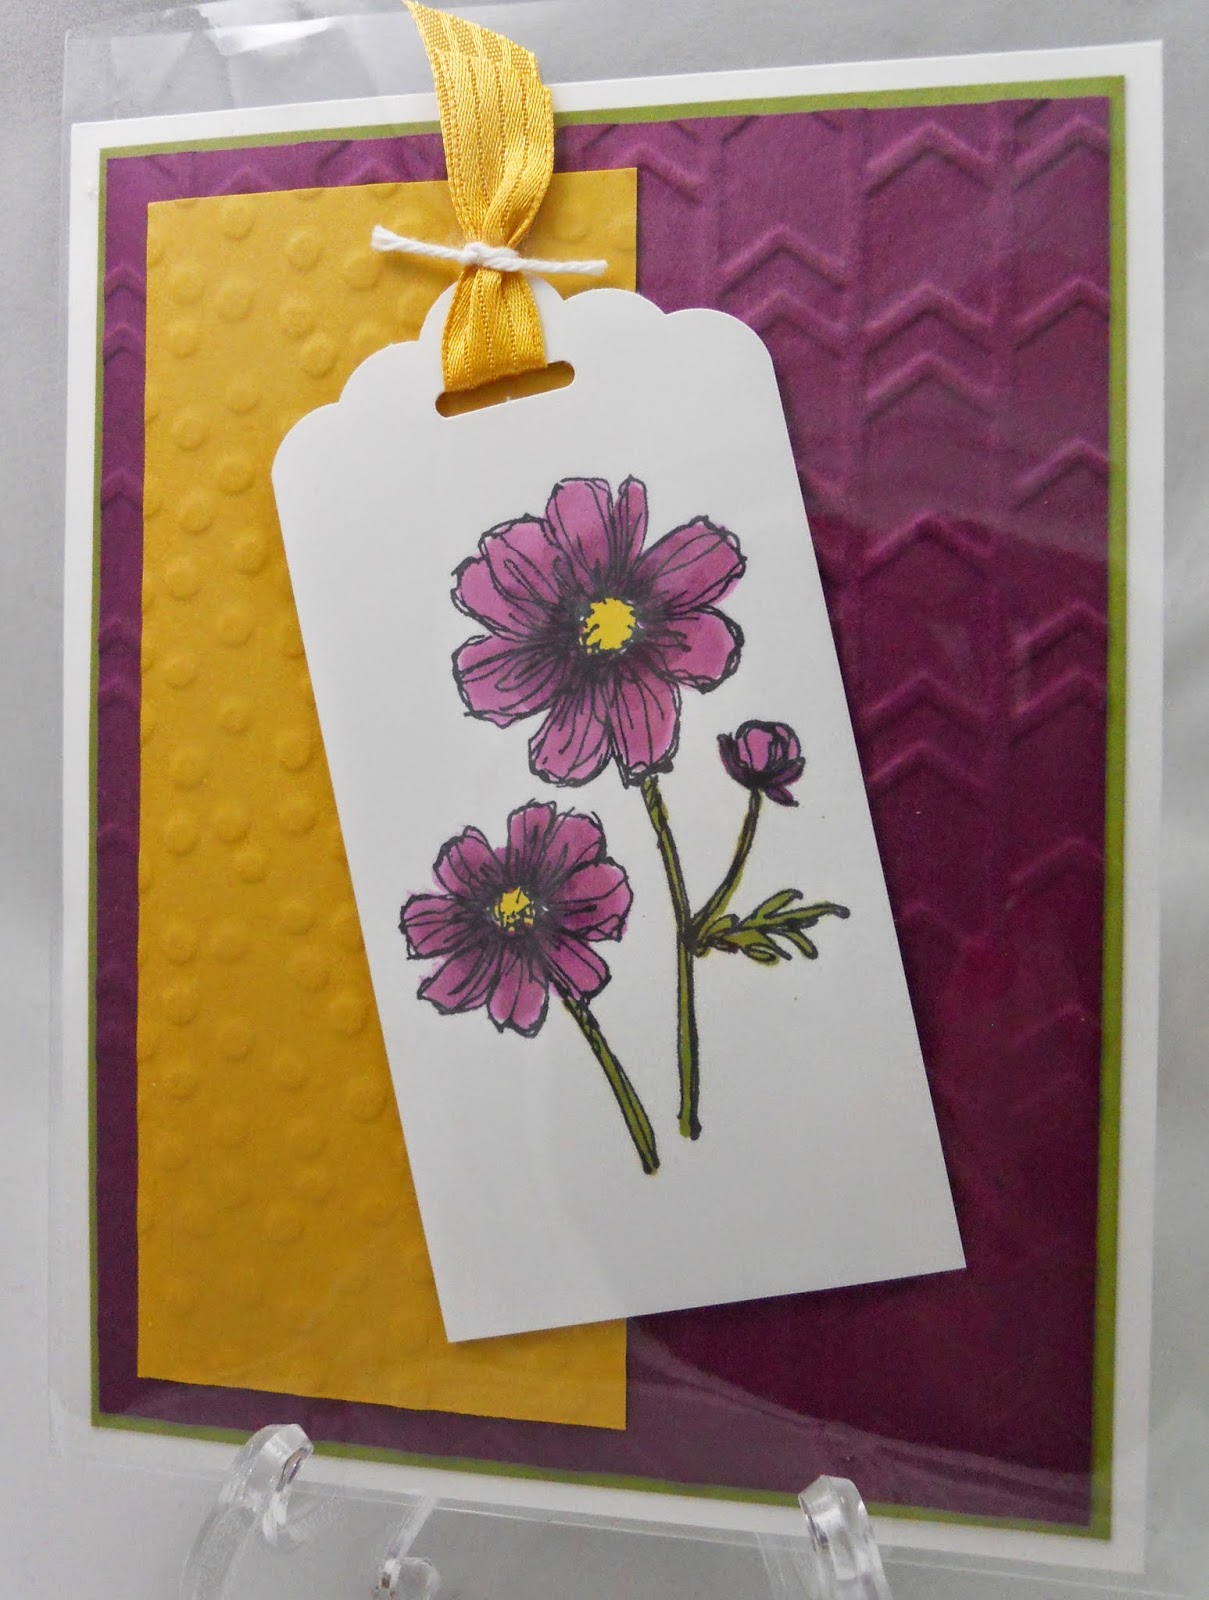
The new catalog features several "Suites". This is the Perennial Essence Suite. Everything you need to make this card is listed on page 107. The suite includes the stamp set, punch, DSP, the vellum cardstock, and the textured floral centers. All you add is cardstock, ink, and your imagination!
I made this card during OnStage in April.
I was given the opportunity to participate in a new catalog swap. We had to use new product from the upcoming catalog, have several layers, and use an embellishment. I decided to go outside my comfort zone which is usually a floral stamp and created a more masculine card. This card came together easily as I used a card sketch and the great products from this suite. I can't wait to get back 15 cards which I will share. The new catalog goes live on June 4. Please leave me a message if you would like one.
Supplies:
Stamps- Sailing Home
Paper- Night of Navy, Sahara Sand, Come Sail Away Memories DSP
Inks- Night of Navy, VersaMark
Embellishments- Baker's Twine in Night of Navy and Sahara Sand, Sail Away Trinkets, Clear Embossing Powder
I wanted the sailboat to be embossed but Stampin" Up! does not make Night of Navy embossing powder. Instead I first inked up my stamp with VersaMark then inked on top of it with Night of Navy. I dipped the image in clear embossing powder then heat set it.
Today I celebrated Mother's Day with my mom. After brunch I gave her this card. It features the floating frame technique. This was my third card using this method. It is a bit time consuming but well worth it. I stamped the images, fussy cut them, then arranged all of the pieces onto a piece of card stock. Next I took a piece of Glad Press n' Seal, sticky side down, and put it on top of the card stock. Then I trimmed off the excess Glad, flipped it over, and used several Stampin' Dimensions on each piece. Last I carefully turned it over and attached it to the card stock.
Before I share my On Stage swaps, I would like to share what my Easter cards. I enjoy making Easter cards and enclosing gift cards for my adult children. The ducks were for my daughter and my son's girlfriend. They were so much fun to color. I am trying to use my Stampin" Up! Blends more and my proficiency is improving!
The rabbit reminds me of Peter Rabbit and this card went to my son. He and his girlfriend got Starbucks gift cards and my daughter got a Dunkin card. I will be very sad when the gingham DSP retires with the Occasion's catalog in June. I guess a good substitute will be the Buffalo Check stamp. At least I will be able to make it in any color!
This past weekend I traveled to Atlantic City with my downline to attend Stampin' Up!'s On Stage. We saw lots of new product suites and had the opportunity to play with new stamp sets! We even got the new catalog. This photo is with my tablemates who were from Maryland and New York state. I am in the middle. I made 2 different swaps which I will share with you soon. I also got 20 birthday and thank you cards.
Unfortunately I needed a bereavement card. My former principal just lost his mother after a long struggle with Alzheimer's disease. This card was simple to make yet elegant and understated. This embossing folder is very thick and heavy. The trick to get a good embossed effect is to lightly mist the paper with water then run it through the Big Shot.
I tried to resist buying this stamp but could not help myself! There have been many samples on Pinterest using this set and stamping on Vellum with white embossing powder. I had to make one. My first attempts were messy. Even though I used the Embossing Buddy the powder splashed and little pieces went outside the lines. I was very disappointed with the results. I did some research and found that if you heat set it from underneath the powder does not move. When it came time to color, I also colored it on the wrong side using Blends. I chose pastel colors and like the clean look of the final card. It
reminds me of spring which in New Hampshire is just a dream!
Hint
Attaching Vellum can be tricky but you can use TomBoy adhesive, spread on thinly and it virtually disappears.
Supplies:
Stamp Set- All That You Are
Paper- WW, Gingham Gala, Vellum Card Stock
Ink- VersaMark, Balmy Blue
Accessories-Rectangle Stitched Framelets Dies, Meadow Moss Blends, Balmy Blue Blends, Calypso Coral Blends, Stamping Dimensionals
My internet has been down! How did we every live without it?
Last Saturday I had a class with the stampers who have been with me the longest. We made this card which was a big hit. For those of you who went to a Stampin" Up! event last April, this was the basic layout of one of our Make-N-Takes. I love the DSP- Garden Impressions and the contrast between the light and dark. I made this same card using Calypso Coral as the base but it did not seem to have the same pop. I am still using greetings from Sincere Salutations, long since retired, which was a gift to demonstrators from Shelli Gardner way back when. No other set has proven to be as versatile to me. I am a little behind with my punches and also used a retired one. Be assured a new one is on its way to me and will arrive next week.
Supplies:
Stamp Sets- Love What You Do, Sincere Salutations (retired)
Paper- Night of Navy, Vellum, DSP Garden Impressions
Ink- Night of Navy
Accessories- Pearls, Doily
This is my mom with me stamping last weekend. She will be 91 and is my oldest stamper!
This card is for a very special person in my son's life who just got a new job. She is an absolute sweetheart and I am so proud of her. The design is from the Paper Players Sketch Challenge for Sunday, February 24, 2019. I find these challenges are great to jumpstart a project.
Supplies:
Stamps- Tea Together from the Occasions Catalog, sentiment unknown
Paper- WW, Blueberry Bushel, Garden Impressions DSP, Watercolor Paper
Inks- Calypso Coral, VersaMark
Accessories- White Embossing Powder, Tea Time Framelits Dies, Stampin' Dimensionals PP430 A Sketch Challenge from Ann
I have made three of these so far and gave two as gifts. The kit had much of what I needed to make them but I also used the Perpetual Calendar Calendar stamp set. I supplied the adhesive and ink and supplemented with stamp sets that I had such as the little snowman, jack'o-lantern , and Santa.
I used an assembly line approach and made each month in order. I varied them slightly. After I completed them, or at least I thought they were done, I discovered that I could have stamped the lower right hand corner too. Oh well! I was pleased with the final products.
Supplies:
Stamp Sets- Perpetual Birthday Calendar, various retired sets
Ink- Various colors
Sale-A-Bration came a bit earlier this year. What is Sale-A-Bration
you might ask? Sale-A-Bration is a fantastic promotion Stampin' Up!
offers each year to reward its customers. For every $50 spent, from
either catalog, customers and demonstrators can select merchandise from
the special Sale-A-Bration's catalog. Products include new stamp sets,
paper, accessories, and 10 Blendabilities!!! That's right, for every
$50 you spend you can get one of the original Blendabilities sets- they
are valued at $11.95 each. If you do not have all of the original Blendabilities, now is the time to get them. We all know how easy it is to spend $50 on wonderful Stampin' Up! products. If you host a party with $250 in sales, you even earn $25 more in host dollars. Reward yourself with additional savings! Sale-A-Bration is from January 6- March 31.
This is one of the new stamp sets from the Sale-A-Bration Catalog that is being released tomorrow, Tuesday, January 6, 2015. This Photopolymer stamp, Lotus Blossom, is a three step stamp. Each stamp has a triangle at the top which makes it easier to line up all three layers. Each flower uses only one ink color. The ribbon is also from the Sal-A-Bration Catalog. It is difficult to see in this photo but the outside edge of the white matte is scored on all 4 sides. I colored pearls Calypso Coral using a Blendabilities.
I like to remember my paraeducators at Christmas, who work so closely with the children I case manager and do a terrific job. This year I needed to remember six people. I decided monogrammed note cards when I saw this set in the new Occasions Catalog. I chose not to use Stampin' Up!'s precut and scored notecards because I wanted them to be card sized (4-1/4" X 5-1/2").
I embossed all the cards first using the Filigree Textured Impressions Embossing Folder. After embossing so many I became very good at lining the cardstock in the folder, making sure the embossing was centered.
Next, using the plastic grid I had previously applied to the back of Clear-Mount Block E, I lined up each letter. At first it was tricky but when I applied the Photopolymer stamps directly on the grid side, it became much easier. Then I added the little flourishes on each side. and was done!
Supplies:
Stamp Set- Sophisticated Serifs (a freebie for increasing my November sales!)
Paper- WW
Ink- Various SU markers
Accessories- Filigree Textured Impressions Embossing Folder
This little Santa is so cute and jolly. I was drawn to him. Using Blendabilities, he was fast to color in. Add some Dazzling Diamonds, a greeting and some red matting and this card is done!
Supplies:
Stamp Set- Get Your Santa On
Paper- WW, Real Red
Ink- Momento Tuxedo Black, Real Red
Accessories- Blendabilities, Black Marker, Silver Marker, Dazzling Diamonds
If you have not yet been able to tell, I like red all year round. I have a red house and a red car. Some day I will get my little red sports car (had my children and a 2 seated just wasn't practical!)
These cards feature the Snowflake Card Thinlits Dies. I also used the Northern Flurry Embossing Folder. I can't decde if I like it in red or white. You decide!
Supplies:
Stamp Set- Tiny Tiny Wishes, Snowflake Soiree
Paper- WW, Real Red
Ink- Real Red
Accessories- Snowflake Card Thinlits Dies, Northern Flurry Embossing Folder, Word Window Punch, Rhinestones
Since I have been taking some blogging time off, I decided to update my header to let everyone know I was back. This card was my inspiration. The first time I saw this stamp set I knew I had to have it! I played and played with it and this is the version I like best. It is so serene and peaceful. It reminds me of why I love New Hampshire. The cardinals add a splash of color. Dazzling Details add the sparkle. It was quick and easy to make.
Supplies:
Stamp Sets- White Christmas, Warm Words (retired)
Paper- WW, Soft Sky
Inks- Basic Gray, Real Red, Momento Tuxedo Black, various Blendabilities
Accessories- Dazzling Details
This will be my first but not last card featuring the Holiday Home stamp set. It is a Photopolymer stamp and I must admit I am really liking this type of stamp. Obviously it is clear and you can position the image exactly where you want it. It is also very sticky and once on a clear acrylic block, it doesn't budge until you remove it. Stampin' Up! is also now putting them in clear-mount stamp cases.
This card was CASED from Debbie Henderson of Maine. I found it in Stampin' Up!'s on-line site exclusively for demonstrators. She made this a regular card. I wanted to make a shadow box card and changed the background coloring. The next card I make will have the moon on the other side since I shaded the right side of the house. I also will try other backgrounds. I remember a soot background that might be appropriate on this card. Coloring was done use Blendabilities.
Detailed instructions on how to make a shadow box card can be found on SplitcoastStampers under tutorials. This card uses (2) 4-1/4" by 5-1/2" pieces of cardstock that are scored on each short side at the 1/2" and 1" marks. One piece has the circle cut out. I find it easier to use a separate piece of card stock to stamp the scene and then adhere it to the card back. This card will flatten and can be mailed using a standard size envelope.
School has started and I am going to try and post something at least once per week! I can't believe this is the start of my 27th year with my school district.
Here is another card using Bloom with Hope. The white edging was nicely done and the contrast with black is something I had not thought to do. It was made by Sue Dillon from Sarasota, Fl.
This is another card using the stamp set I Like You! Joy Nelson from Aurora, CO made this card. I like her use of color and the different accessories she used to layer for interest.
This card features the hostess set Bloom with Hope. It was made by Sandy Carlson from Moorhead, MN.