Wednesday, October 31, 2012

Snowflake Soiree II

Here is try number two using the Snowflake Soiree stamp set.  I used Midnight Muse and Bashful Blue inks on Whisper White.  After I wrapped a piece of Midnight Muse ribbon around it, I mounted it on Midnight Muse. I added rhinestones to the centers of the big snowflakes.  For the greeting, I stamped in Real Red, cut the ends, then rubbed it using my bone folder to break done the fibers to make it curve more easily.

Supplies:
Stamp set- Snowflake Soiree
Paper- Midnight Muse, Whisper White
Inks- Midnight Muse, Bashful Blue, Real Red
Accessories- Midnight Muse ribbon, Rhinestones

Monday, October 29, 2012

Snowflake Soiree I

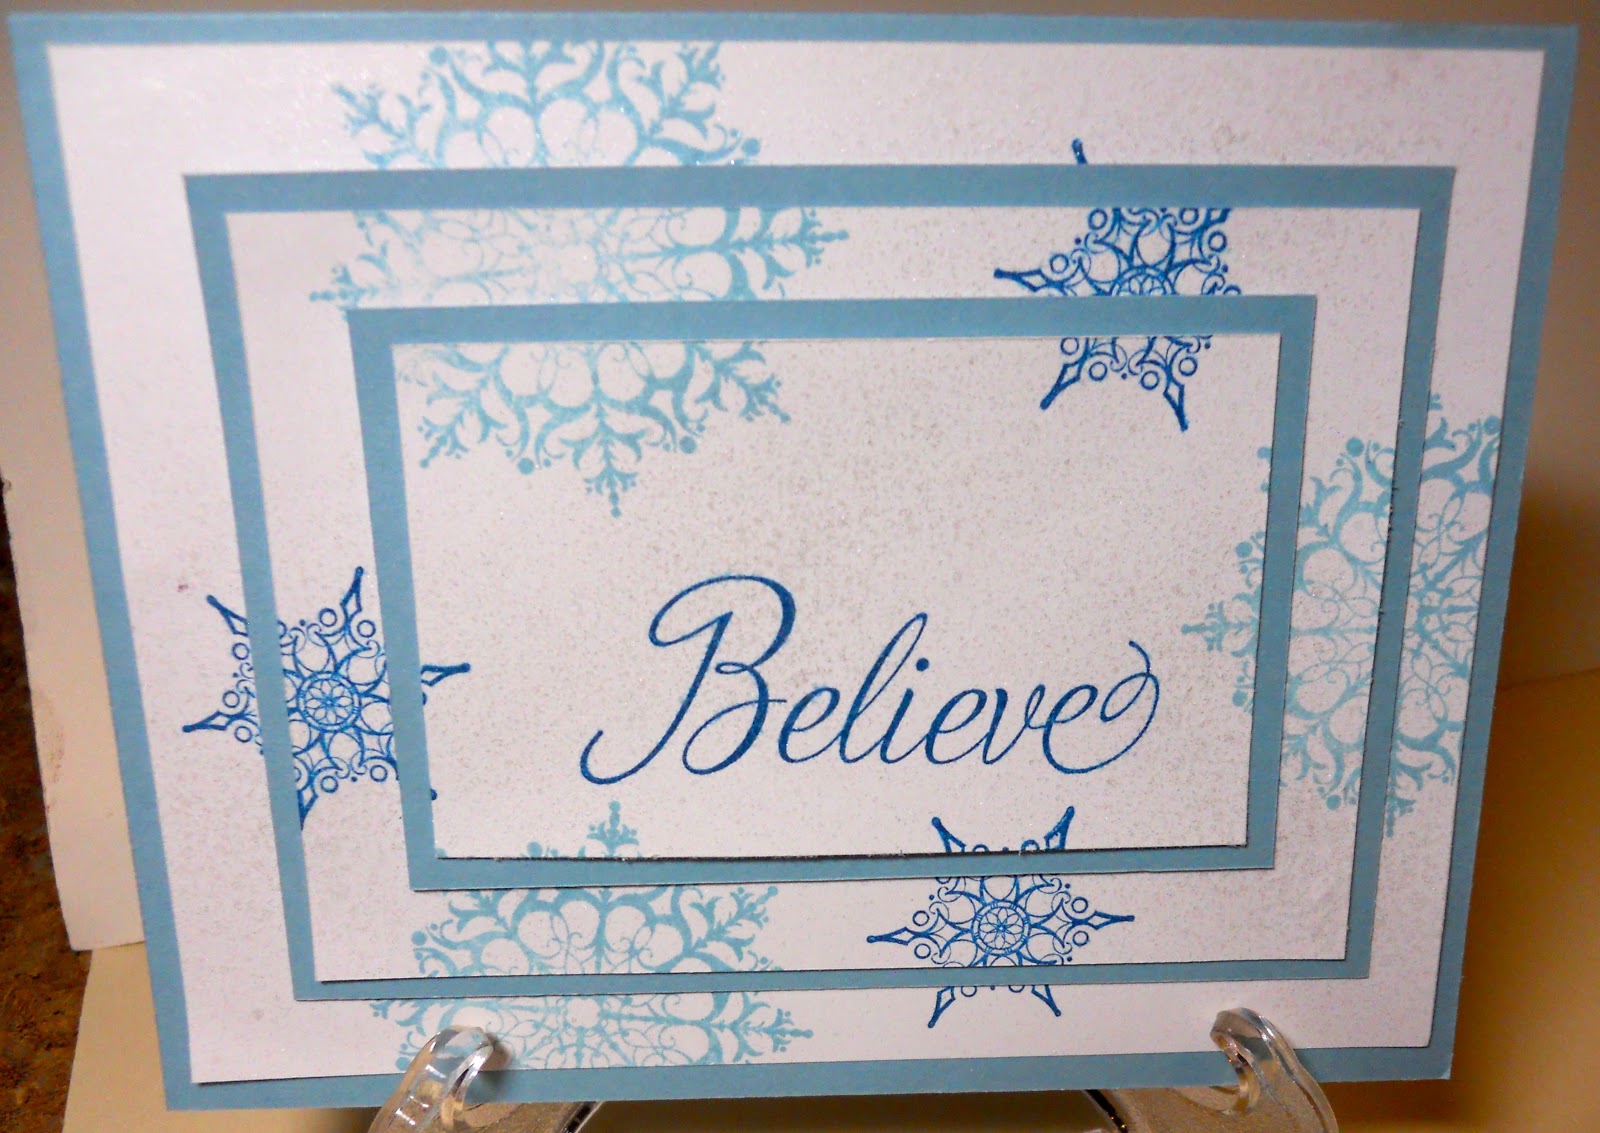
I decided to purchase Stampin' Up!'s newest snowflake stamp set so I could be current.  I am glad I did!!!!  I like that each snowflake is unique, a bit different, and varies in size.

I used the Triple Time Stamping Technique that I learned about from the blog Stamp With Brian.  I am loving this technique because it is so versatile.  I am sure you will see it again and again throughout the different seasons.

For this card I used Baja Breeze and Not Quite Navy.  Although you might not be able to tell, I added Silver Foil Smooch Spritz to make it sparkle.

On a side note, I used my new Stampin' Up! paper trimmer.  It works great.  I am so glad I got it.

Supplies:
Stamp Set- Snowflake Soiree
Paper- Baja Breeze, Whisper White
Ink- Baja Breeze, Not Quite Navy
Accessories- Silver Foil Smooch Spritz

Saturday, October 27, 2012

Perfectly Preserved III

For card number 3, I used just two colors- Whisper White and Cherry Cobbler.  I stamped the apple three times and attached it to a piece of Cherry Cobbler using Dimensionals.  I mounted this on Whisper White which I mounted on the card base of Cherry Cobbler.  I stamped "just for you" and cut it out using the new Bitty Banners Framelits.  This was another fast and easy card.

Supplies: Perfectly Preserved
Paper- Whisper White, Cherry Cobler
Ink- Cherry Cobbler
Accessories- Bitty Banners Framelits

Thursday, October 25, 2012

Perfectly Perserved II

I am very guilty of using a stamp set just a couple of times.  Today I decided to make several different cards using the same stamp set.  Here is card number 2.  I used more of the Orchard Harvest DSP (instead of hoarding it!) and chose the More Mustard checkered pattern.  I matted it on More Mustard.  Next I stamped the preserve's jar using Early Espresso on Very Vanilla.  I added Lucky Limeade stems then More Mustard, Raspberry Ripple, and Island Indigo flowers. For the edging, I used Island Indigo and the Finishing Touches Edgelit.  This was a very fast and simple card to make!

Supplies:
Stamp- Perfectly Preserved
Paper- Orchard Harvest DSP, More Mustard, Very Vanilla
Ink- Early Espresso, Lucky Limeade, More Mustard, Raspberry Ripple, Island Indigo
Accessories- Finishing Touches Edgelit

Tuesday, October 23, 2012

Perfectly Perserved I


I bought this stamp set during the pre-order period Stampin' Up! demonstrator's get.  That was in August.  I finally put it together last week and used it for a workshop.  Feeling very uninspired, I turned to Stampin' Success our exclusive magazine for demos.  I CASE'd it directly. I like the bright colors and the use of the edging.

Supplies:
Stamp Set- Perfectly Perserved
Paper- Orchard Harvest DSP, Island Indigo, More Mustard,      Vellum
Ink- Raspberry Ripple, More Mustard, Island Indigo, Lucky Limeade
Accessories- Linen Thread, Lucky Limeade ribbon, Edgelet-Adorning Accents


Sunday, October 21, 2012

Wondefall Thank You Tag

I was asked to design and create a tag card for one of my new customers who had just had a house warming party.  She wanted a fall theme using the rich autumn colors of New Hampshire.  I made a pocket for the tag and topped the tag with a piece of Designer Series paper.  I would have liked to have added a button but these were going to be mailed.  I used the Woodgrain Textured Impressions Embossing folder on top of the base of the pocket and the Square Lattice folder for the leaves.  Using the Autumn Accents Bigz Die, I got out 6 leaves at a time then embossed several in one sweep.  It was fast and easy to do!  She was very pleased with the results.

Supplies:
Stamp Set- Wonderfall
Papers- Crumb Cake (but for the real ones I substituted Naturals Ivory), Chocolate Chip, Cajun Craze, Cherry Cobbler, Old Olive
Accessories- Woodgrain and Square Lattice Textured Impressions Embossing folders, retired Chocolate Chip ribbon

Saturday, October 20, 2012

Whoops!!!

Whoops!!! I forgot to post.  I thought I had more scheduled than I did.  It has been a busy week.

Here it is completed.  I am not always pleased with projects when they are finished.  However, I am very pleased with this.  It was packed and shipped to my daughter last weekend and she got it on Monday.  I was shocked due to the fact it took 10 days for her birthday card to reach her mailbox.  I went back and changed out some of the boxes in the one I made last year and am now happier with my own.  I guess every year it would be fairly simple to take one scene out and change it around to freshen it up.

Some of my customers are not big Halloween fans, imagine that!  They have asked me to create a Christmas one.  I think that will be fun to make and I hope to start on it tomorrow.

Saturday, October 13, 2012

"L,L"

These were my last letters and I thought I had lost my mojo.  It was plain and uninspiring.  I added the little mummy from Googly Ghouls, wrapped it in Baker's Twine and added a googly eye.  Still not right.  Next I made Frankenstein and popped him on using Dimensionals.  Better.  Last I added the bat from the same set.  Much better!

Thursday, October 11, 2012

"A"

The last letters have been the most fun.  For embellishments to "A" I needed to make a cat.  My daughter loves cats and is not quite yet a "cat lady".  She is stopping at three.  They are well cared for and rule her house.  Her latest addition is Sushi, a large black and white long haired cat.  I thought of Sushi as I made this feline.  I used the 1-3/4" circle punch for the body. Next I cut a second circle then punched again to get the arc for the tail.  The ears and feet are from the retired 5 petal punch.  The pumpkin was made from three 1" circles.

Tuesday, October 9, 2012

"N"

"N" was also simple.  I used the oval punch to cut out 3 ovals to form the pumpkin.  Before putting them together, I sponged the edges with Pumpkin Pie.  The ghosty was made from the owl punch.  I cut out a Pumpkin Pie owl then one in Whisper White.  I turned it upside down, cut off the feet, added eyes, and a mouth, then voila!- a little owl all set to go trick or treating.

Sunday, October 7, 2012

"W"

I like the simplicity of "W".   I used the owl punch to make this darling little owl.  For the wings, I used the scallop punch, cut it in half, then folded each to make it seem like he was flapping his wings.  The googlie eyes make him playful!

Friday, October 5, 2012

"bOO"

"bOO" was fun to make!  I used a textured embossing folder to emboss the "b" and the "O".  I used the Designer Rosette Bigz XL to make the second "O".  They are so easy and quick to make.  I used the retired bat punch for the two bats.

Wednesday, October 3, 2012

"EE"

For the letters "EE" I used Old Olive polka dotted DSP.  I embossed it using the Spider Web Textured Impressions Embossing Folder.  Next I rubbed the new Illuminate Glimmer Watermark Stampin' Pad.  I used Sticky Strip directly on the DSP for the spinneret then added glitter.  I might add a pompom for the spider's nose.

Monday, October 1, 2012

Halloween

I love Halloween.  I adore Halloween.  OK, you get the picture.  I am making a Halloween decoration for my daughter.  It will be framed and spell out "Halloween".  This is the first letter.  Of course it is all Stampin' Up! materials and a mixture of old and new.  I will post each letter then a picture of it all done. The bat features the owl punch.  Note the letter H is textured and raised.